Click here to download a PDF version of the instructions.
Overview
PeopleSoft Finance 9.2 will have the ability for Campus users to enter Budget Amendments throughout the Fiscal year. These Budget Transfers do not affect the annual submission of the Budget.
- To gain access to enter Budget Transfers for your Department, submit the two forms:
- PeopleSoft Finance Access for Individual
- PeopleSoft Finance Online Approval for Department.
- Security Forms and related Instructions available
- Who to contact regarding Budget Transfers or Errors, please contact Budget Office.
Navigation
From the home page, click on the Campus Workcenter. Expand the Journals section. Click on the link for Budget Transfer Entry.

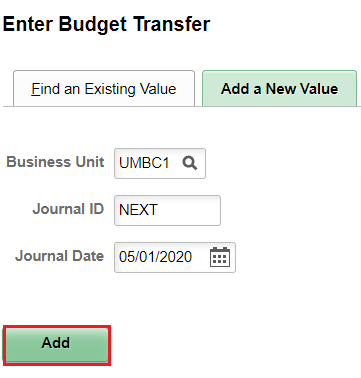
Add a New Journal
On the Add a New Value Tab, the default values are “UMBC1”, “NEXT” and today’s date as the Journal Date.
Journal Date dictates the Fiscal Year and period of this budget transfer.
To create a new Journal Entry, Press the ‘Add’ Button.
Budget Transfer Header
Select Ledger Group:
- CC_EXPENSE is the default setting for the Ledger Group. Accounts for expense start with 6 or 7
- Select CC_REVENUE for Revenue entries. Revenue accounts start with 4 or 5
- Revenue and Expense Accounts can *not* co-mingle on one budget transfer.
The Fiscal Year and Period is are pre-populated.

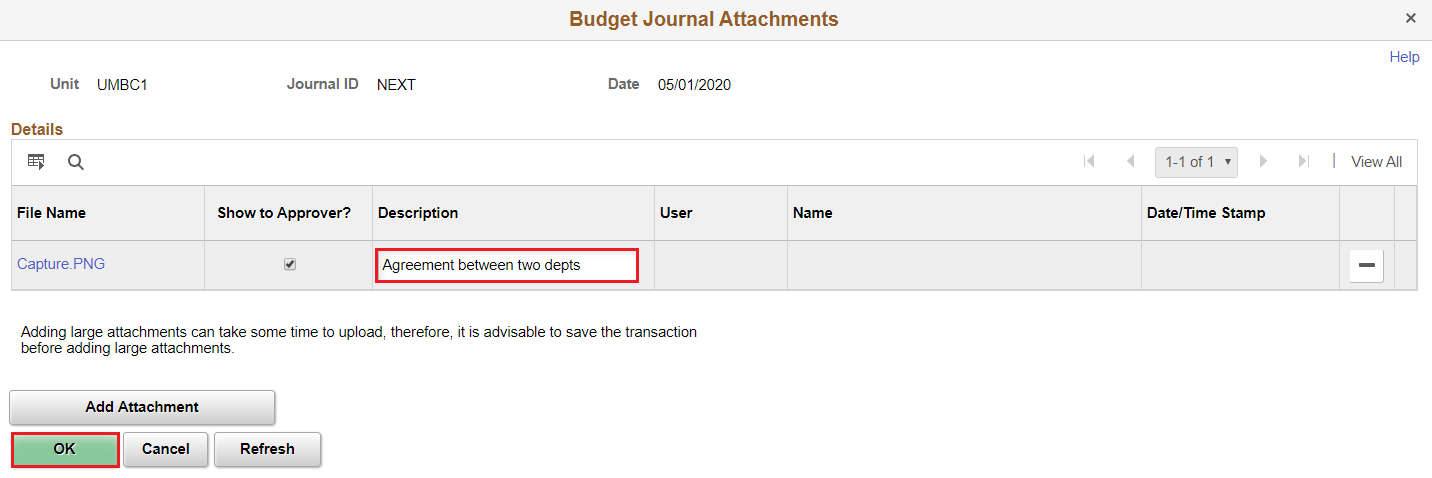
Attachments
A new Feature in the Budget Transfer is Attachments, which will save the backup supporting the journal in PeopleSoft Finance. This can be viewed by anyone on campus, so please avoid sensitive data, such as social security numbers.
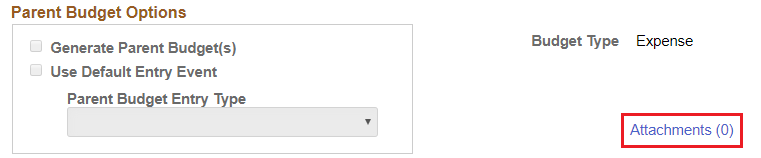
After clicking the Attachments Link, it will bring you to this screen.
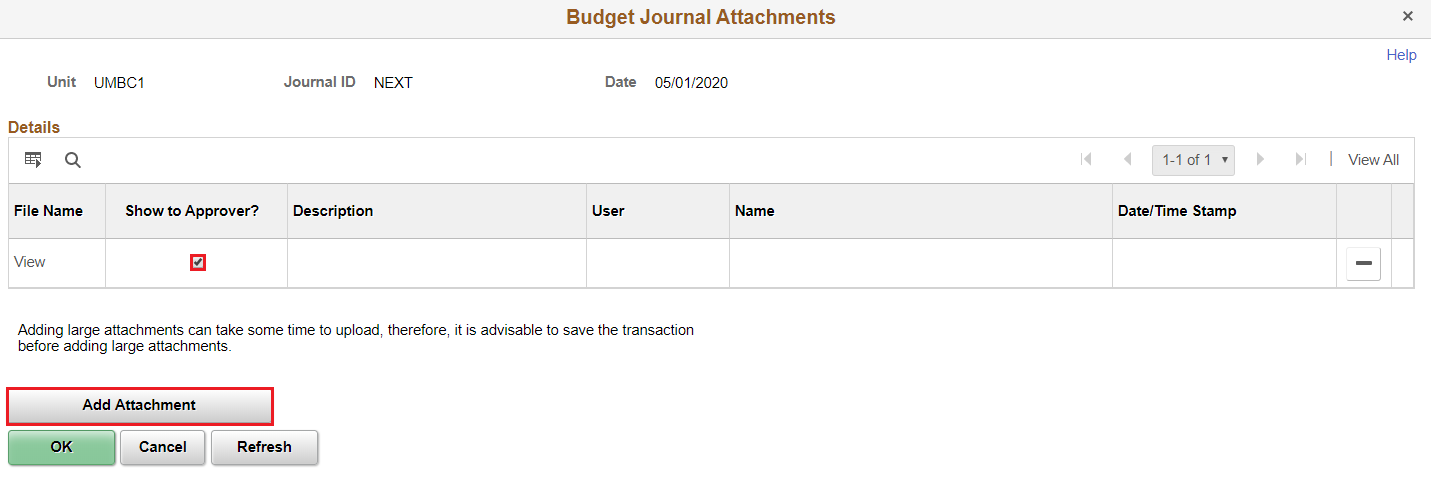
Leave the box next to “Show to Approver?” checked.
Click Add Attachment.
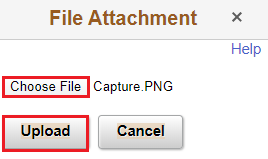
- Browse button to select File, select the file, Click Open button to select.
- Click Upload button to attach.
- For 1 file, click OK button. For 2 or more files, click Add Attachment
- For each file, please enter a Description that will assist the Approver in understanding the purpose of the attachment.
Budget Lines
Now that an appropriate Attachment has been included, please click on the ‘Budget Lines’ Tab.
The next steps are to enter the Line chartstring information. See “Budget Transfer Entry Helpful Hints” at the end of this document for help with some of the chartfield data entry, including Debit or Credit information.
Enter chartfield information by typing the information into the fields or selecting the magnifying glass. Start with your department chartstring on line 1.
*Note*: For project, please use 00000000, rather than leaving it blank. Leaving it blank will generate a subsequent error that will prevent posting. Grants should never really be used on Budget Transfers, so 00000000 should be the only value used.
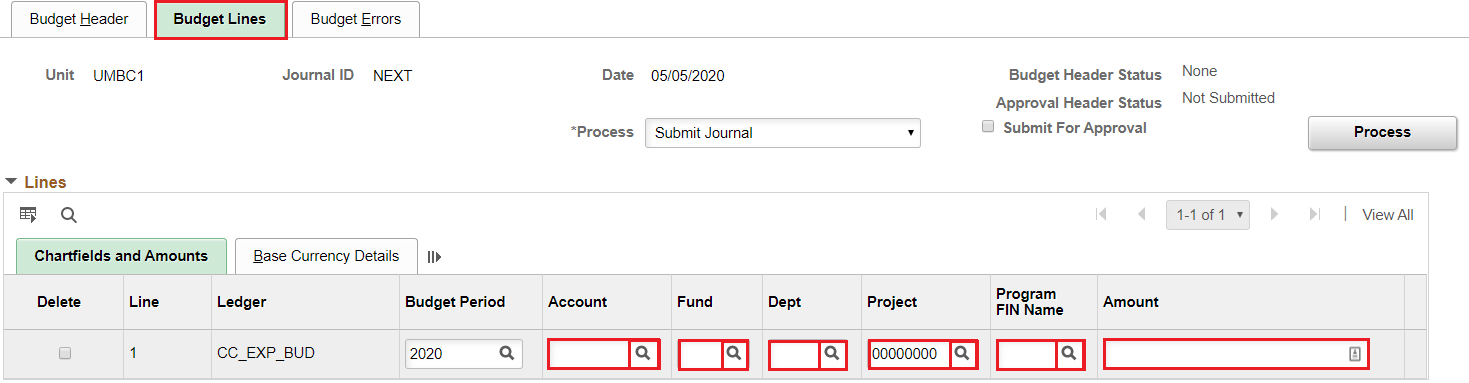
When creating line 2 and beyond, you can select the + key and add multiple lines.
If you add 1 line, with the plus key, it will copy all the chartstring fields from the line 1. If you would like to copy the fields selectively, click on “Journal Line Copy Down” to uncheck fields that you do not want line 2 and beyond to have.

(This is helpful if line 1 is your department, but line 2-10 is random departments.)
Now that the budget transfer has been entered, please click ‘Save’ in the lower left hand corner. This will change Journal ID from NEXT to a 10 digit number.
Select ‘Edit Chartfield’ in the ‘Process’ dropdown field, and then select the Process Button.
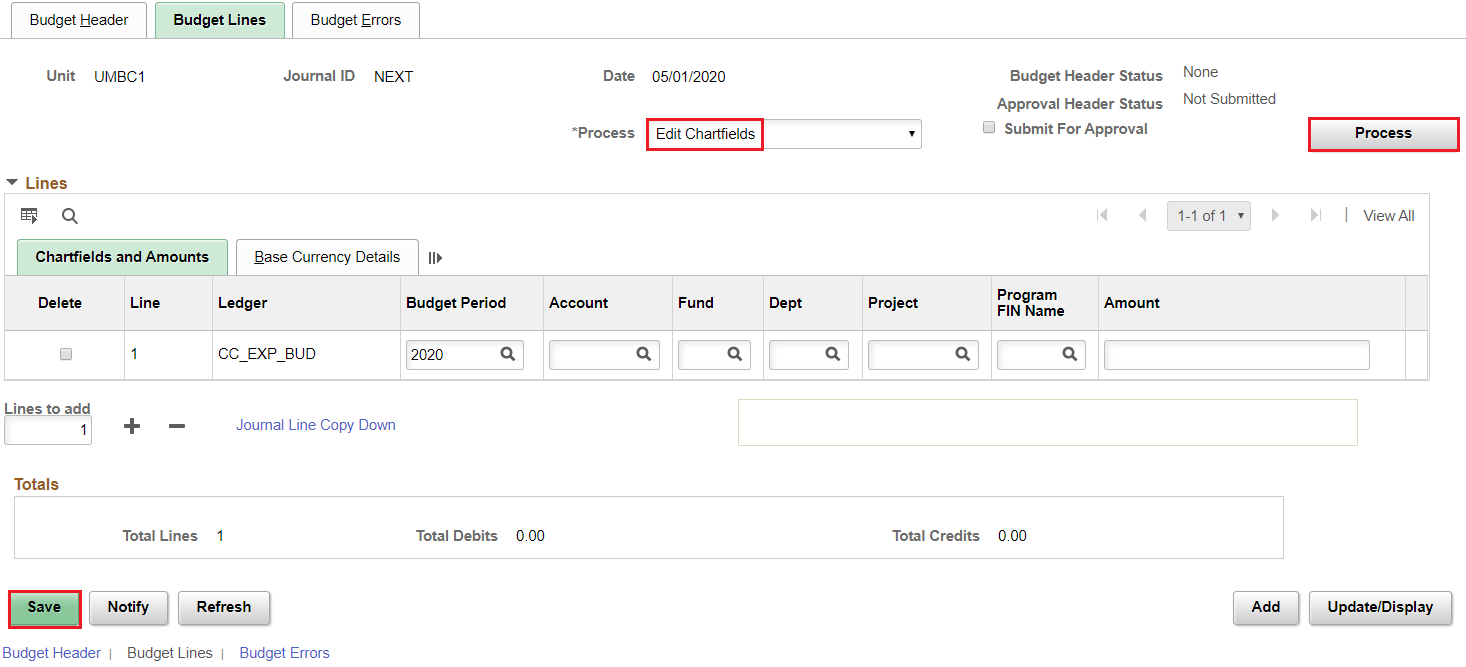
If there are no errors with the Edit Chartfields process, select ‘Submit Journal’ in the Process field dropdown menu. Select the checkbox next to ‘Submit for Approval’, and then select the Process Button.

When the Budget Transfer is submitted for approval, it routes to the list of Departmental Approvers for the departments listed on the Journal Lines. To see who will be approving the journals, please click on the link in the “Pending” box. This example has one Fund Approval box, but other journals may have multiple.
Copy a Budget Transfer
To COPY a Budget Transfer:
- While in the Lines tab of a journal:
- Select the Process drop down box to be ‘Copy Journal’.
- Note that the Budget year will copy from the previous Journal. So please manually update to the current fiscal year, otherwise it will generate an error message.
- Click Process
